Section “My organization”
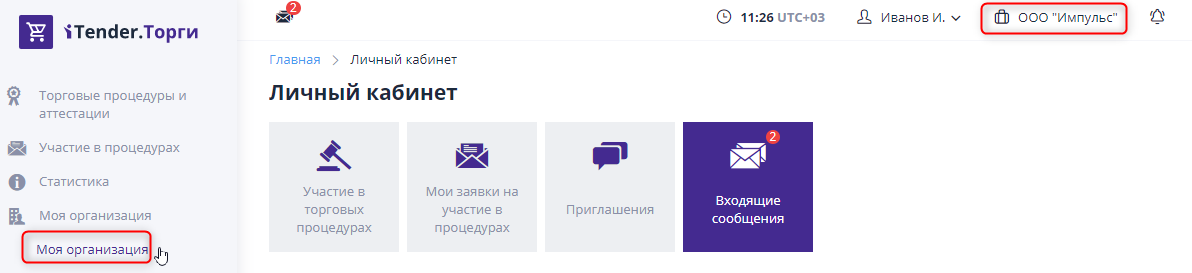
Each authorized user works in the system on behalf of the company of which he is an employee.Go to the “My” page organization" you can click on the company name in the top menu or by clicking on the “My organization” link in the left menu:
Information about the organization
On the “My Organization” page, an employee can see the main legal and contact information about the company, as well as documents organizations:
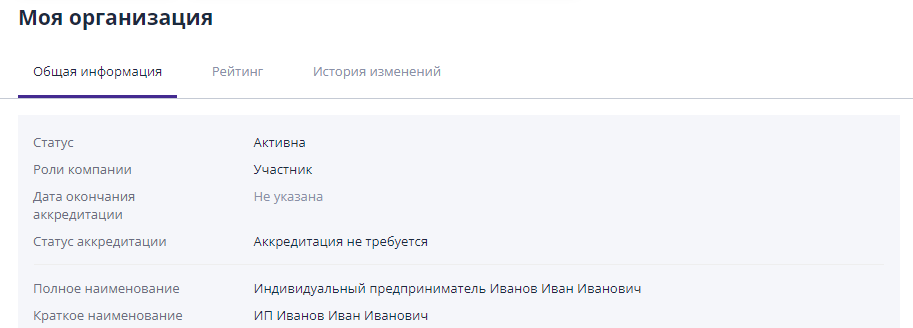
An employee with the role can change information and documents of the organization "Company Administrator"
Employees of the organization
This block of the “My Organization” page contains a list of employees organizations.To quickly search for an employee, click on the link "Filtering options", fill in the required fields and click on "Search" button:
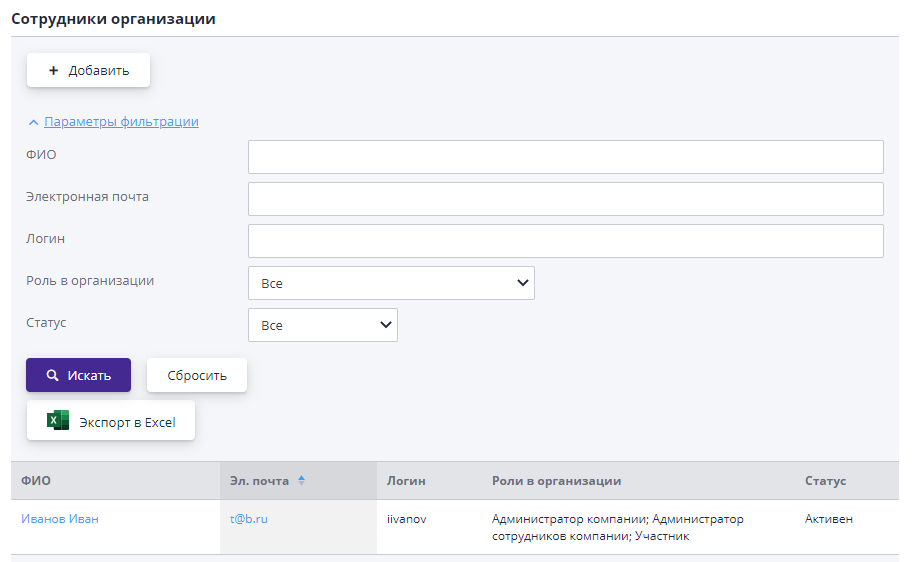
A user with the “Company Employee Administrator” role can edit the list of all company employees registered on ETP, and add new ones:
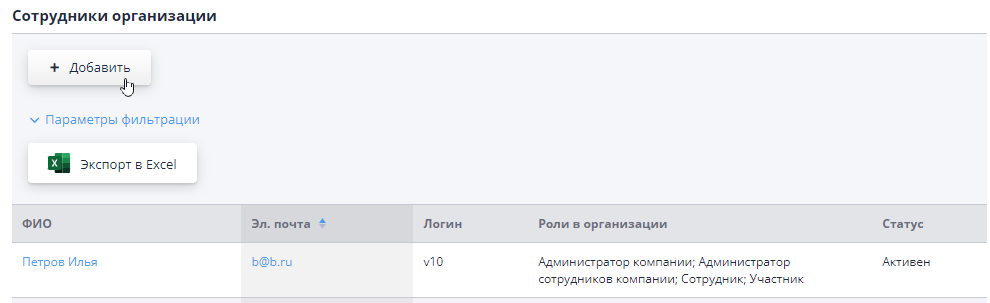
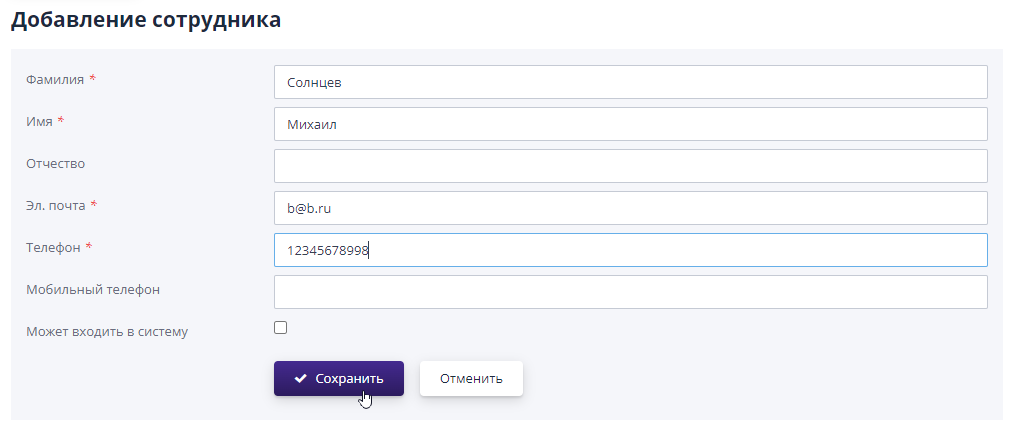
To add a new employee, you must use the button "Add".Next, the company administrator must fill out Required fields: last name, first name, email, phone and roles. In order for a new employee to be able to log in to the system, it should be noted check the box “Can log in to the system” and write in the “Login” field that appears login of the user being created.This is not necessary, you can login add later when editing employee data.When everything the required fields are filled in, click on the "Save" button, and a new user will be created:
On the employee page, the company employee administrator can edit general information about the employee, as well as his role on site:
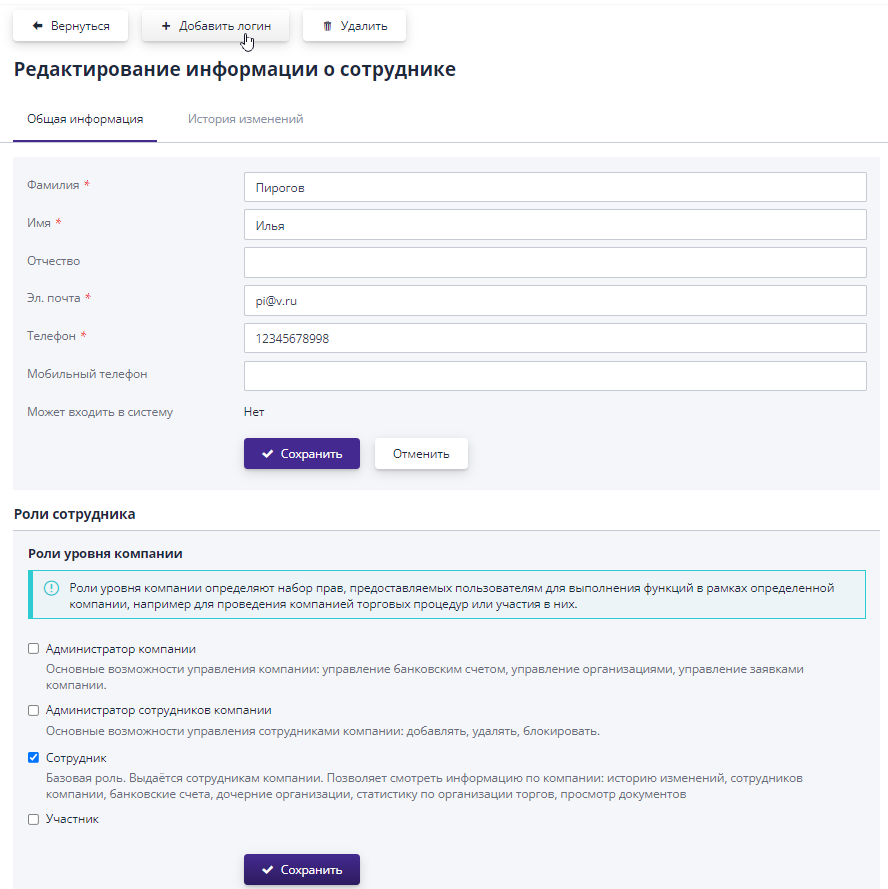
When information about an employee or his role on the site changes you must click on the “Save” button in the corresponding block.
If the user was created without a login, then on the page with his With personal information, you can always assign a login to it.For this you need to click on the “Add login” button, enter it into the form and click "Save":
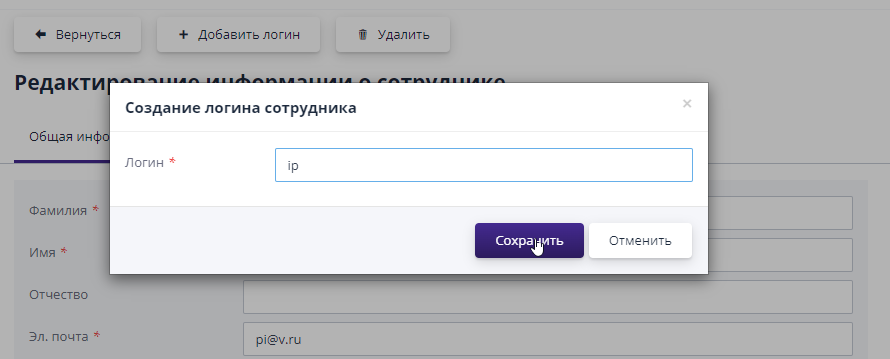
To the specified contact email address for the new user you will receive a letter with your personal login and automatically generated password.After authorization in the system, the password can be changed to a more comfortable.
After the user has been assigned a personal login, interface of the company employee administrator on the “Information about employee" instead of the "Add login" button a button will appear "Block", by clicking on which you can block this the user logs in to the electronic trading platform.For that to return the blocked user's ability to log in and to work in the system, you must click the “Unlock” button.
The company employee administrator can delete someone registered on user site.Then all user data will be deleted from systems.
Roles of employees on site
Company employee administrator - a user with this role can change information about employees of the organization.
Company administrator - a user with this role can manage bank accounts and manage the organization.
Other roles are specific to different types of organizations and are described in relevant manuals.
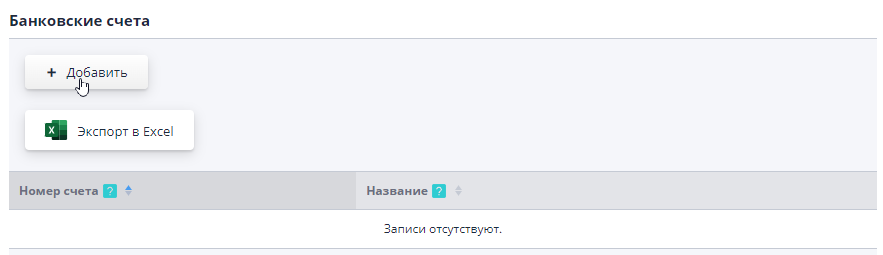
Organization bank accounts
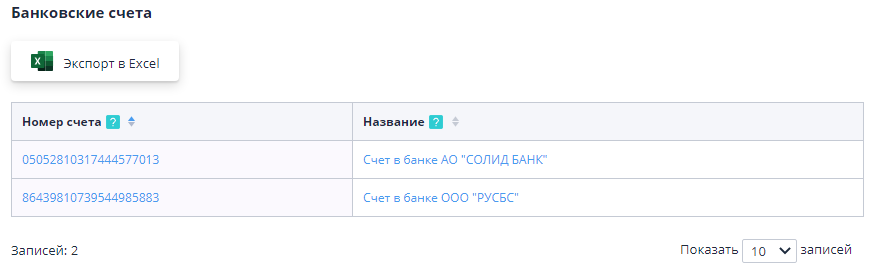
In the “Bank Accounts” block a list of the organization’s accounts is available:
A user with the “Company Administrator” role can add a new check.To do this, click the “Add” button:
On the form for adding an account, you must specify the account details and click "Save".The bank name and BIC are searched automatically from directory when entering part of the name in the “Bank” field.
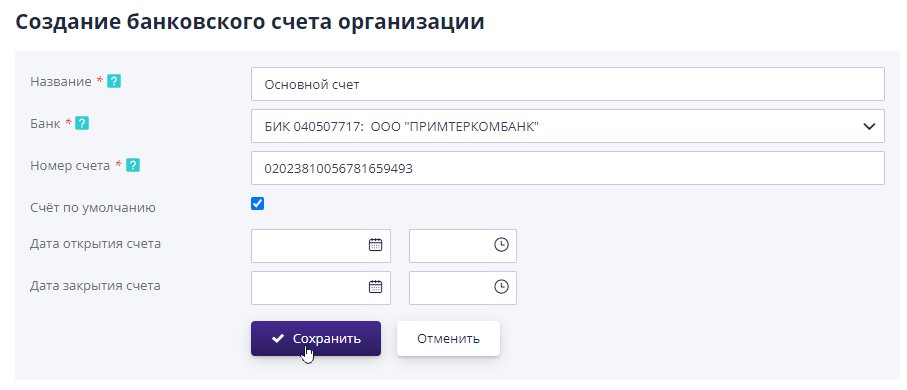
If the required bank is not found in the list, then you need to contact the operator by writing an email with a request to add the bank to the system.The name must be indicated in the appealbank, BIC and correspondent account.
On the account view page, a user with the “Administrator” role company" can edit the invoice by entering new data and clicking on "Save" button.

History of changes
The "Change History" tab displays events that occurred in an organization - changes in company statuses, as well as actions, committed by company employees (for example, creating a procedure, submitting applications for participation):
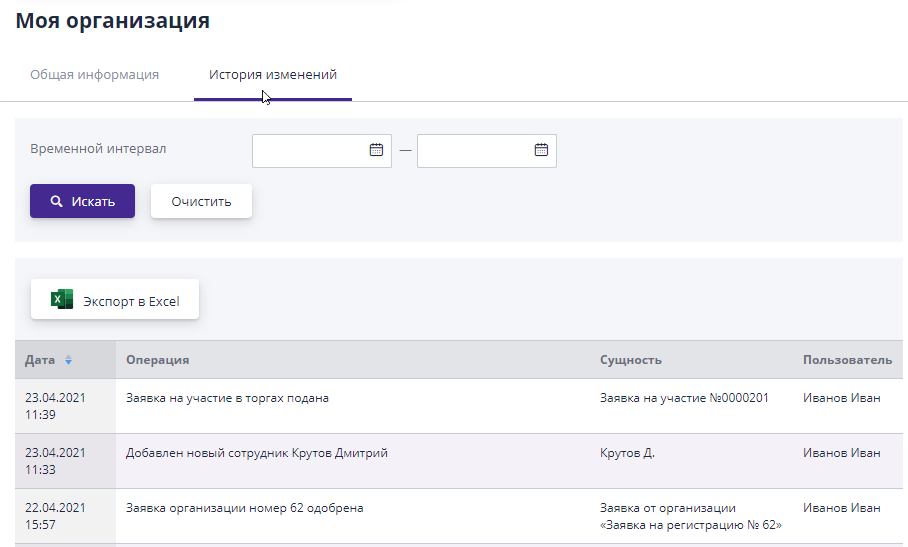
You can select a specific time interval in which the transactions were made. actions in the company.To do this, you must specify the start date and date end in the “Time interval” filter and click on the button "Search".